Tuesday, April 6, 2010

Marguerita Slush

To go with the rainbow cupcakes, here's Marguerita Slush. (Also great on it's own)..

You will need:

2 cans limeade, frozen concentrate, thawed
6 cups water
1 cup tequila (or full flask)
1 cup triple sec (add according to taste)
4 litres 7-Up®


PREP:

Combine all ingredients except 7-Up in bucket.

Cover and freeze for at least 8 hours.

Stir twice during freezing process.

To serve, rub cut lime around glass rim, tip glass upside down and dip in sugar,
spoon slush into glasses and pour 7-Up over.


Enjoy!

Monday, April 5, 2010

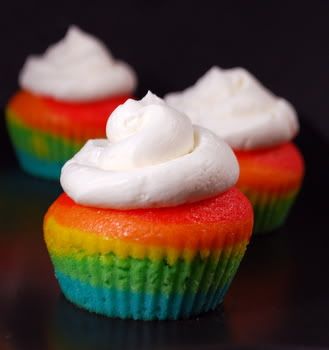
Rainbow Cupcakes!

You can use these directions for any type of basic cake or cupcake recipe. They are really fun to make on a rainy day. I'll be making these after supper tonight along with some much needed Marguerita Slush!! XD They go hand in hand over easter break so why not? You don't even need to ice them. They're perfect on their own.


Here's what you'll need:

125.0 gram Butter
125.0 gram Self-Raising Flour
125.0 gram Caster Sugar
2.0 Egg(s)
Vanilla Extract
3.0 tbsp Milk
4.0 Food Coloring
12.0 Cupcake Baking Case(s)


PREP:

Preheat oven to 350

Round up your ingredients

Beat the sugar and butter together, until fluffy and light coloured


Beat in the eggs one at a time, adding a little flour each time, until you've added it all.


Ad the vanilla essence, mix

one tbsp milk, mix

one tbsp milk, mix

one tbsp milk, mix


Divide between 6 bowls

Bowl 1- Add half a cap full of red colouring

Bowl 2- Add half a cap full of red and half a cap full of yellow

Bowl 3- Half a cap of yellow

Bowl 4- Half a cap full of green

Bowl 5- Half a cap full of Blue

Bowl 6- Half a cap full of Blue, half a cap full of Red.

Obviously, mix after youve added the colourings


Divide the purple bowl between the 12 cases. smooth to form bottom layer.

Repeat with the other bowls in this order:
Blue
Green
Yellow
Orange
Red

Put in the oven for 10-15 mins

skewer to find out if it's ready, if it comes out gunky, put it back in the oven! if clean, then pop on a cooling rack


Decorate!!!

go crazy!


Sunday, April 4, 2010

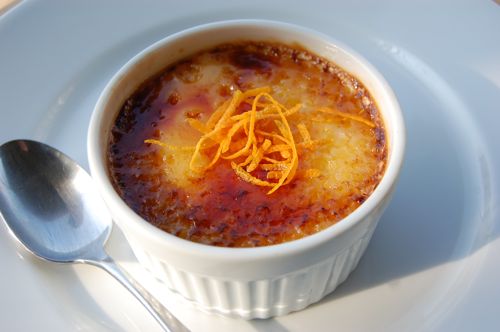
Crème Brûlée a l'Orange for any late night dessert!

I LOVE My Cafe torch. It's my best friend. Even when I'm not cooking, I like to play with it. It makes me feel like the Kitchen Mistress(or Master for all you sexist mongrels). It makes me feel safe, knowing I have a nice little weapon tucked away for any intruder into my kitchen. So in tribute to my Cafe Torch and to those of you who also own one, here is my favorite crème brûlée recipe.


Begin preparing the custards a day ahead so that they can chill overnight.

You Will Need:

6 large egg yolks
1/2 cup plus 6 teaspoons sugar
1 1/3 cups whipping cream
2/3 cup whole milk
2 1/2 teaspoons grated orange peel
1 1/2 tablespoons Grand Marnier or other orange liqueur


PREP

Preheat oven to 325°F. Lightly butter six 3/4-cup soufflé dishes or custard cups. Beat egg yolks and 1/2 cup sugar in medium bowl to blend. Bring cream, milk and orange peel to simmer in medium saucepan over medium-high heat. Gradually whisk hot cream mixture into yolk mixture.

Stir in Grand Marnier.

Divide custard among prepared dishes. Set dishes in large baking pan. Add enough hot water to pan to come halfway up sides of dishes. Bake custards until just set in center, about 40 minutes. Remove from water. Cool, then cover and refrigerate overnight.

Sprinkle 1 teaspoon of sugar over each dish. Torch until sugar browns, 1-3 seconds.
Refrigerate 1 hour.

For those who do not own a torch, here is the broiler method:

Preheat broiler. Arrange soufflé dishes on baking sheet. Sprinkle 1 teaspoon sugar over each. Broil until sugar browns, rotating baking sheet for even browning and watching closely to avoid burning, about 2 minutes. Refrigerate 1 hour. (Can be made 6 hours ahead. Keep refrigerated.)

And THAT my friends is one of the most glorious desserts you will ever taste. Hope you enjoyed it and continue to make it.

Saturday, April 3, 2010

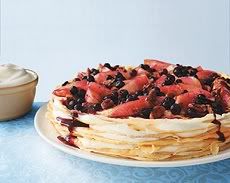
CRÊPE CAKE!!!!! With Caramelized Apples & Wild Blueberries!

So I've spent the entire day cooking Easter supper. All By myself! Deboned turkey, with vegetables, blueberry pudding, yorkshire puddings, and of course, Graaaaavy. Mmm MMm Mmmmmm. It was great! I've impressed myself, but my feet are saying "I hate you". So the menu from yesterday to tomorrow is as follows: Friday/Fried cod fillets, hashbrown casserole, ceasar salad, potato roasters. Saturday(Today)/Turkey(deboned), vegetables(potato,carrot,cabbage,turnip), blueberry pudding, yorkshire pudding, salt meat & Bunny cake. Sunday/ Prime rib and all the trimmings. Monday/Sleep....

Since it's been a long day, I feel like a treat. Crepes are possibly one of my absolute favorite things to make. SO EASY and SO GOOD. So Versatile.
So for the crepe lovers out there, heres to you...

You Will Need:
1 1/2 cup All-purpose flour
2 cups Milk
2 Eggs
1 tbsp Granulated sugar
1 cup 35% whipping cream
2 tbsp Icing sugar
1/2 tsp Vanilla extract
1 tbsp Vegetable oil
1 tbsp Butter
2 Organic Gala Apples, peeled and sliced into 1/2-inch (1 cm) slices
3 tbsp Unsalted butter
3 tbsp Honey
1/2 cup Chopped Pecans
1/2 cup Frozen Wild Blueberries


PREP:
In a bowl, whisk flour and milk until smooth. Add eggs and sugar and whisk until smooth, about 10 seconds. Let stand 10 min.

Meanwhile, beat whipping cream, icing sugar and vanilla until firm. Cover and refrigerate until ready to use.

Heat a 10-inch nonstick skillet over medium heat. Melt butter and oil together in microwave for 30 seconds; stir to blend. With a heat-resistant brush, brush pan lightly with some of the butter and oil mixture. When pan is hot, pour 1/3 cup batter in pan and swirl pan to coat thinly. Cook until bottom is golden and edges start to curl, about 1 min.

Flip over and cook other side, about 30 seconds. Remove to a platter. Repeat with remaining batter to make 8 crêpes.

Melt butter in a medium nonstick skillet over medium heat, Add apples and cook until lightly browned, about 3 min. Add honey and simmer 1 min. Add pecans and blueberries and simmer 1 min. Remove from heat and let stand for 5 min.

To assemble, lay one crepe on a serving platter. Spread evenly with 1/4 cup whipped cream. Repeat, using all the crepes and whipped cream. Top with apple-blueberry mixture. Cut into eight wedges and serve with additional whipped cream, if desired.

Friday, April 2, 2010

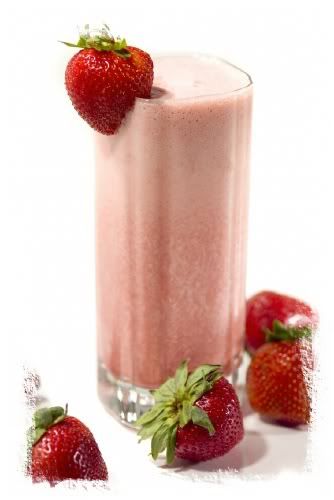
Health Shakes are for quitters. Here's a Smoothie which won't go directly to your thighs....

So I've tried just about everything to keep active. It never works. Always too busy to work out or go for a walk or run or what have you. Even Wiifit. I absolutely LOVE the Wiifit when I'm on it, but I tuck my board away on the tv unit shelf. Even though it takes about 3 seconds to pull out the board and place it on the floor in front of me, I try to justify why it's such a pain in the ass to take it out. But it really isn't. I'm just so busy during the day and all I want to do when I'm home is relax. I'm sure I'm not the only one. So I've put a plan together that might just work. I've come up with a healthy SMOOTHIE that tastes just awesome and is even GOOD FOR YOU. I'm not one to preach about losing weight and being healthy. But this is a great start for all you stressed-and-no-time-to-work-out-just-want-to-relax people. You can even make a larger mixture of the smoothie and keep it in your fridge for a couple of days. So here goes...


You will need:

1/2 cup nonfat milk
1/2 cup fat-free plain yogurt
1/2 frozen banana, peeled and chopped
2 tablespoons powdered protein supplement
1 1/2 tablespoons flax seed
1 teaspoon honey
1/2 cup frozen strawberries


What you do with all of that is:

Throw it all in the blender and puree until smooth. THATS IT!


I keep mine in Mason Jars and just drink it from those. Of course, I like to save on dishwashing as well. So you can feel free to use a cup. :P

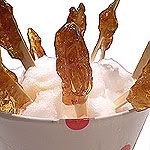
This One's For The Kids: Maple Syrup Taffy Pops

Unfortunately, this recipe requires SNOW. So those of you who can still easily go outside and get a bucket of snow, this one`s for you. (Unless of course you`d like to freeze a bucket of ice and chip it into snow, by all means, go right ahead.)

That being said, If you've ever been to a sugar shack where they turn sap into maple syrup, you've seen and tasted maple syrup taffy pops.
Kids, don't try this project on your own. A grown-up needs to boil the sugar because it gets VERY HOT!


1. Gather your equipment. You will need:

a) A small pot from the kitchen
b) A candy thermometer
c) A baking sheet
d) About 12 popsicle sticks


2. Gather your ingredients. You will need:

a) 2 cups of real maple syrup
b) Clean, untouched snow. Make sure your snow is clean because you're going to eat it!


PREP:

Scoop the snow onto the baking sheet.

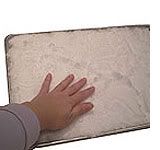
Pack the snow down onto the sheet.


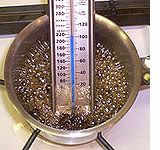
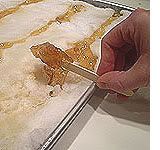
In your small pot, boil the maple syrup to "soft ball" stage on your candy thermometer (235˚F). See this picture? It's VERY HOT! Make sure a grown-up boils the syrup for you. (and grown-ups, be careful too!)


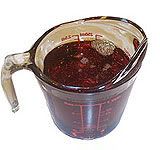
After the syrup has boiled to "soft ball" stage (235˚F), have a grown-up transfer the syrup into a Pyrex measuring cup for pouring.

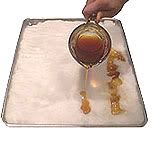
Pour the maple syrup in a line on your snow.


Wait 30 seconds

Roll your maple syrup taffy around a popsicle stick.


Eat your maple syrup pops right away - they won't last!!
And THAT Ladies, Gents, Boils and Ghouls, is how you make Maple Syrup Taffy Pops.
This would make a great treat for the easter holidays.
Disclaimer: All cavities and teeth holes received due to eating this sweet treat will have to be brought to your toothbrush or dentist. Not me. I am not responsible. I just provide the sweets to the sweet. :)

Thursday, April 1, 2010

Cream Cheese Brownies!! MMM MMM MMM

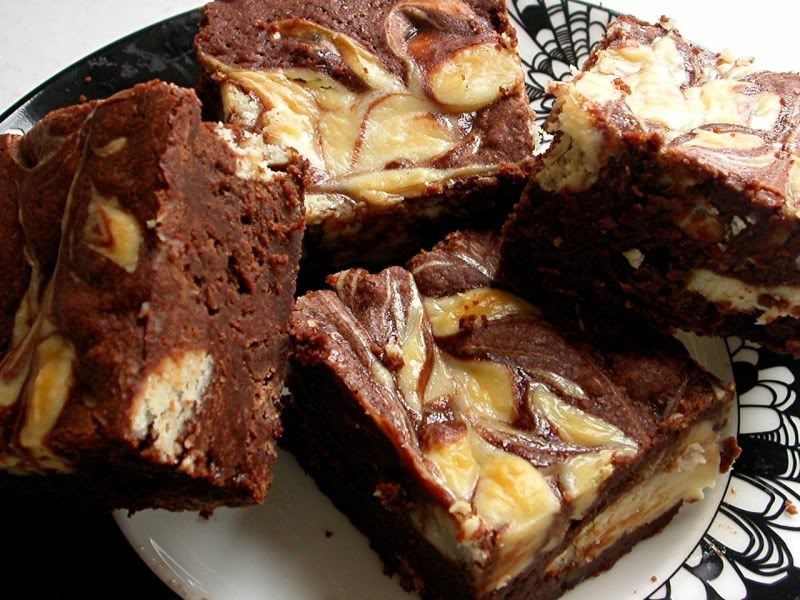
The trick to making a dense and fudgy brownie, besides reducing the amount of flour and using no artificial leavener (baking powder/baking soda), is to incorporate as little air as possible when mixing the batter. So, instead of pulling out the electric mixer we are just going to mix the ingredients together in one bowl with a wooden spoon. The result is a nicely compact brownie with a dense and fudgy texture. Once the brownie batter is in the pan (we do keep some brownie batter for later) we top it with a cheesecake filling. The main component in a cheesecake is cream cheese, that white, soft and spreadable cheese with a slightly tangy flavor. It has a 33% butterfat content so its texture is wonderfully smooth and creamy. The one thing you do need to keep in mind is that cream cheese needs to be at room temperature before it is beaten so it will be nice and smooth with no lumps. Then we add a little sugar, an egg, and some vanilla extract for texture and flavor and after gently spreading it over the brownie layer, there is only one thing left to do. And that is to place small dollops of that leftover brownie batter over the cream cheese filling and then running a knife or wooden skewer through it all to give a nice marbleized effect. You can eat these squares the same day as you make them, but I prefer refrigerating them overnight as this gives the flavors time to soften and mingle.
These are quite possibly my favorite brownie. Soft & Chewy, nobody can resist them!


Brownie Layer:

1/2 cup (113 grams) unsalted butter, cut into pieces

4 ounces (114 grams) unsweetened chocolate, coarsely chopped

1 1/4 cups (250 grams) granulated white sugar

1 teaspoon pure vanilla extract

2 large eggs

1/2 cup (65 grams) all purpose flour

1/4 teaspoon salt

Cream Cheese Layer:

8 ounces (227 grams) cream cheese, at room temperature

1/3 cup (65 grams) granulated white sugar

1 teaspoon pure vanilla extract

1 large egg


PREP:

Preheat oven to 325 degrees F (160 degrees C) and place the rack in the center of the oven. Have ready a 9 x 9 inch (23 x 23 cm) square baking pan that has been lined with aluminum foil across the bottom and up two opposite sides of the pan. Set aside.

In a stainless steel (heatproof) bowl placed over a saucepan of simmering water(Bain Marie), melt the butter and chocolate. Remove from heat and stir in the sugar and vanilla extract. Add the eggs, one at a time, beating well (with a wooden spoon) after each addition. Stir in the flour and salt and beat, with a wooden spoon, until the batter is smooth and glossy and comes away from the sides of the pan (about one minute). Remove 1/2 cup of the brownie batter and set aside. Place the remainder of the brownie batter evenly into the prepared pan.

Then in the bowl of your food processor (or with a hand mixer), whip the cream cheese until smooth. Add the sugar, vanilla, and egg and process until creamy and smooth. Spread the cream cheese filling over the brownie layer. Spoon small dollops of the reserved brownie batter evenly on top of the cream cheese filling. Then with a table knife or wooden skewer, swirl the two batters without mixing them.

Bake in the preheated oven for about 25 minutes or until the brownies start to pull away from the sides of the pan and the edges of the brownies are just beginning to brown. Remove from oven and place on a wire rack to cool. Refrigerate the brownies until they are firm enough to cut into squares (at least two hours). Once chilled, remove the brownies from the pan by lifting with the ends of the foil and transfer to a cutting board. With a sharp knife, cut into 16 squares. It is a good idea to have a damp cloth nearby to wipe your knife between cuts. These brownies can be stored in the refrigerator for several days.

Makes about 16 - 2 inch squares.